How to Pack for a Multi-Day SUP Trip
Things are warming up, the days are getting longer. No matter how much you embrace winter, we all eventually hit a point where we are ready for it to be over… and 2020 is definitely no exception.
One of my goals this year is to get more multi-day trips on my paddle board. It’s a spin on the classic Canadian tradition of canoe tripping, yet on a board, it still seems to be a bit of a foreign concept. The most common question I encounter is “how do you fit all your gear on your board?”.

When planning a multi-day SUP trip, here are a couple things I consider:
1. Choosing the right board
Having the right board is key to successful SUP camping. The first thing to consider is the design of your board vs. the conditions you’ll be paddling in. Sticking to flatwater? A longer board with a single fin will help you maximize your mileage. Venturing into downriver trips? You’ll need something more maneuverable (read: shorter) to navigate river features, and swapping that long centre fin for a low profile tri or quad fin set up not only increases the board’s responsiveness, but will also keep you from catching a fin in shallow water.
Unless you’re taking part in a raft-supported trip, you’ll need to strap your gear down on your board. Look for a board that has built in deck rigging or multiple D-rings so you can secure your dry bags – and enough deck space to actually place your gear on it. Sure race boards will get you where you’re going fast, but they lack the storage space you’ll need to bring the essentials. Remember to clip your bags to the rigging. In the event that you capsize, no one wants to be chasing their sleeping bag downriver or downwind after it’s slipped free from your board.

- Keeping your gear dry
I’m sure you’re very confident on your board and you never fall in the water. You still have to assume that things are going to get wet. Invest in a good dry bag, and test it before you leave for your trip – you’ll thank yourself when you’re crawling into your dry sleeping bag at the end of the night!
There are a couple different styles of dry bag, it’s up to you to decide what is best suited for your trip. If you’ll be portaging a reasonable distance, you may want to consider a backpack style dry bag. If you’re paddling right to your campsite, a duffle or sack style bag will work just fine.
When packing your dry bag, split your gear into things that absolutely need to stay dry (tent, sleeping bag) vs. things that would be ok if they got a little wet (a pot, water filter). If you’ve got one really high quality dry bag, make sure your dry gear gets a spot in there. The rest could go in a different bag or even a backpack if push comes to shove.
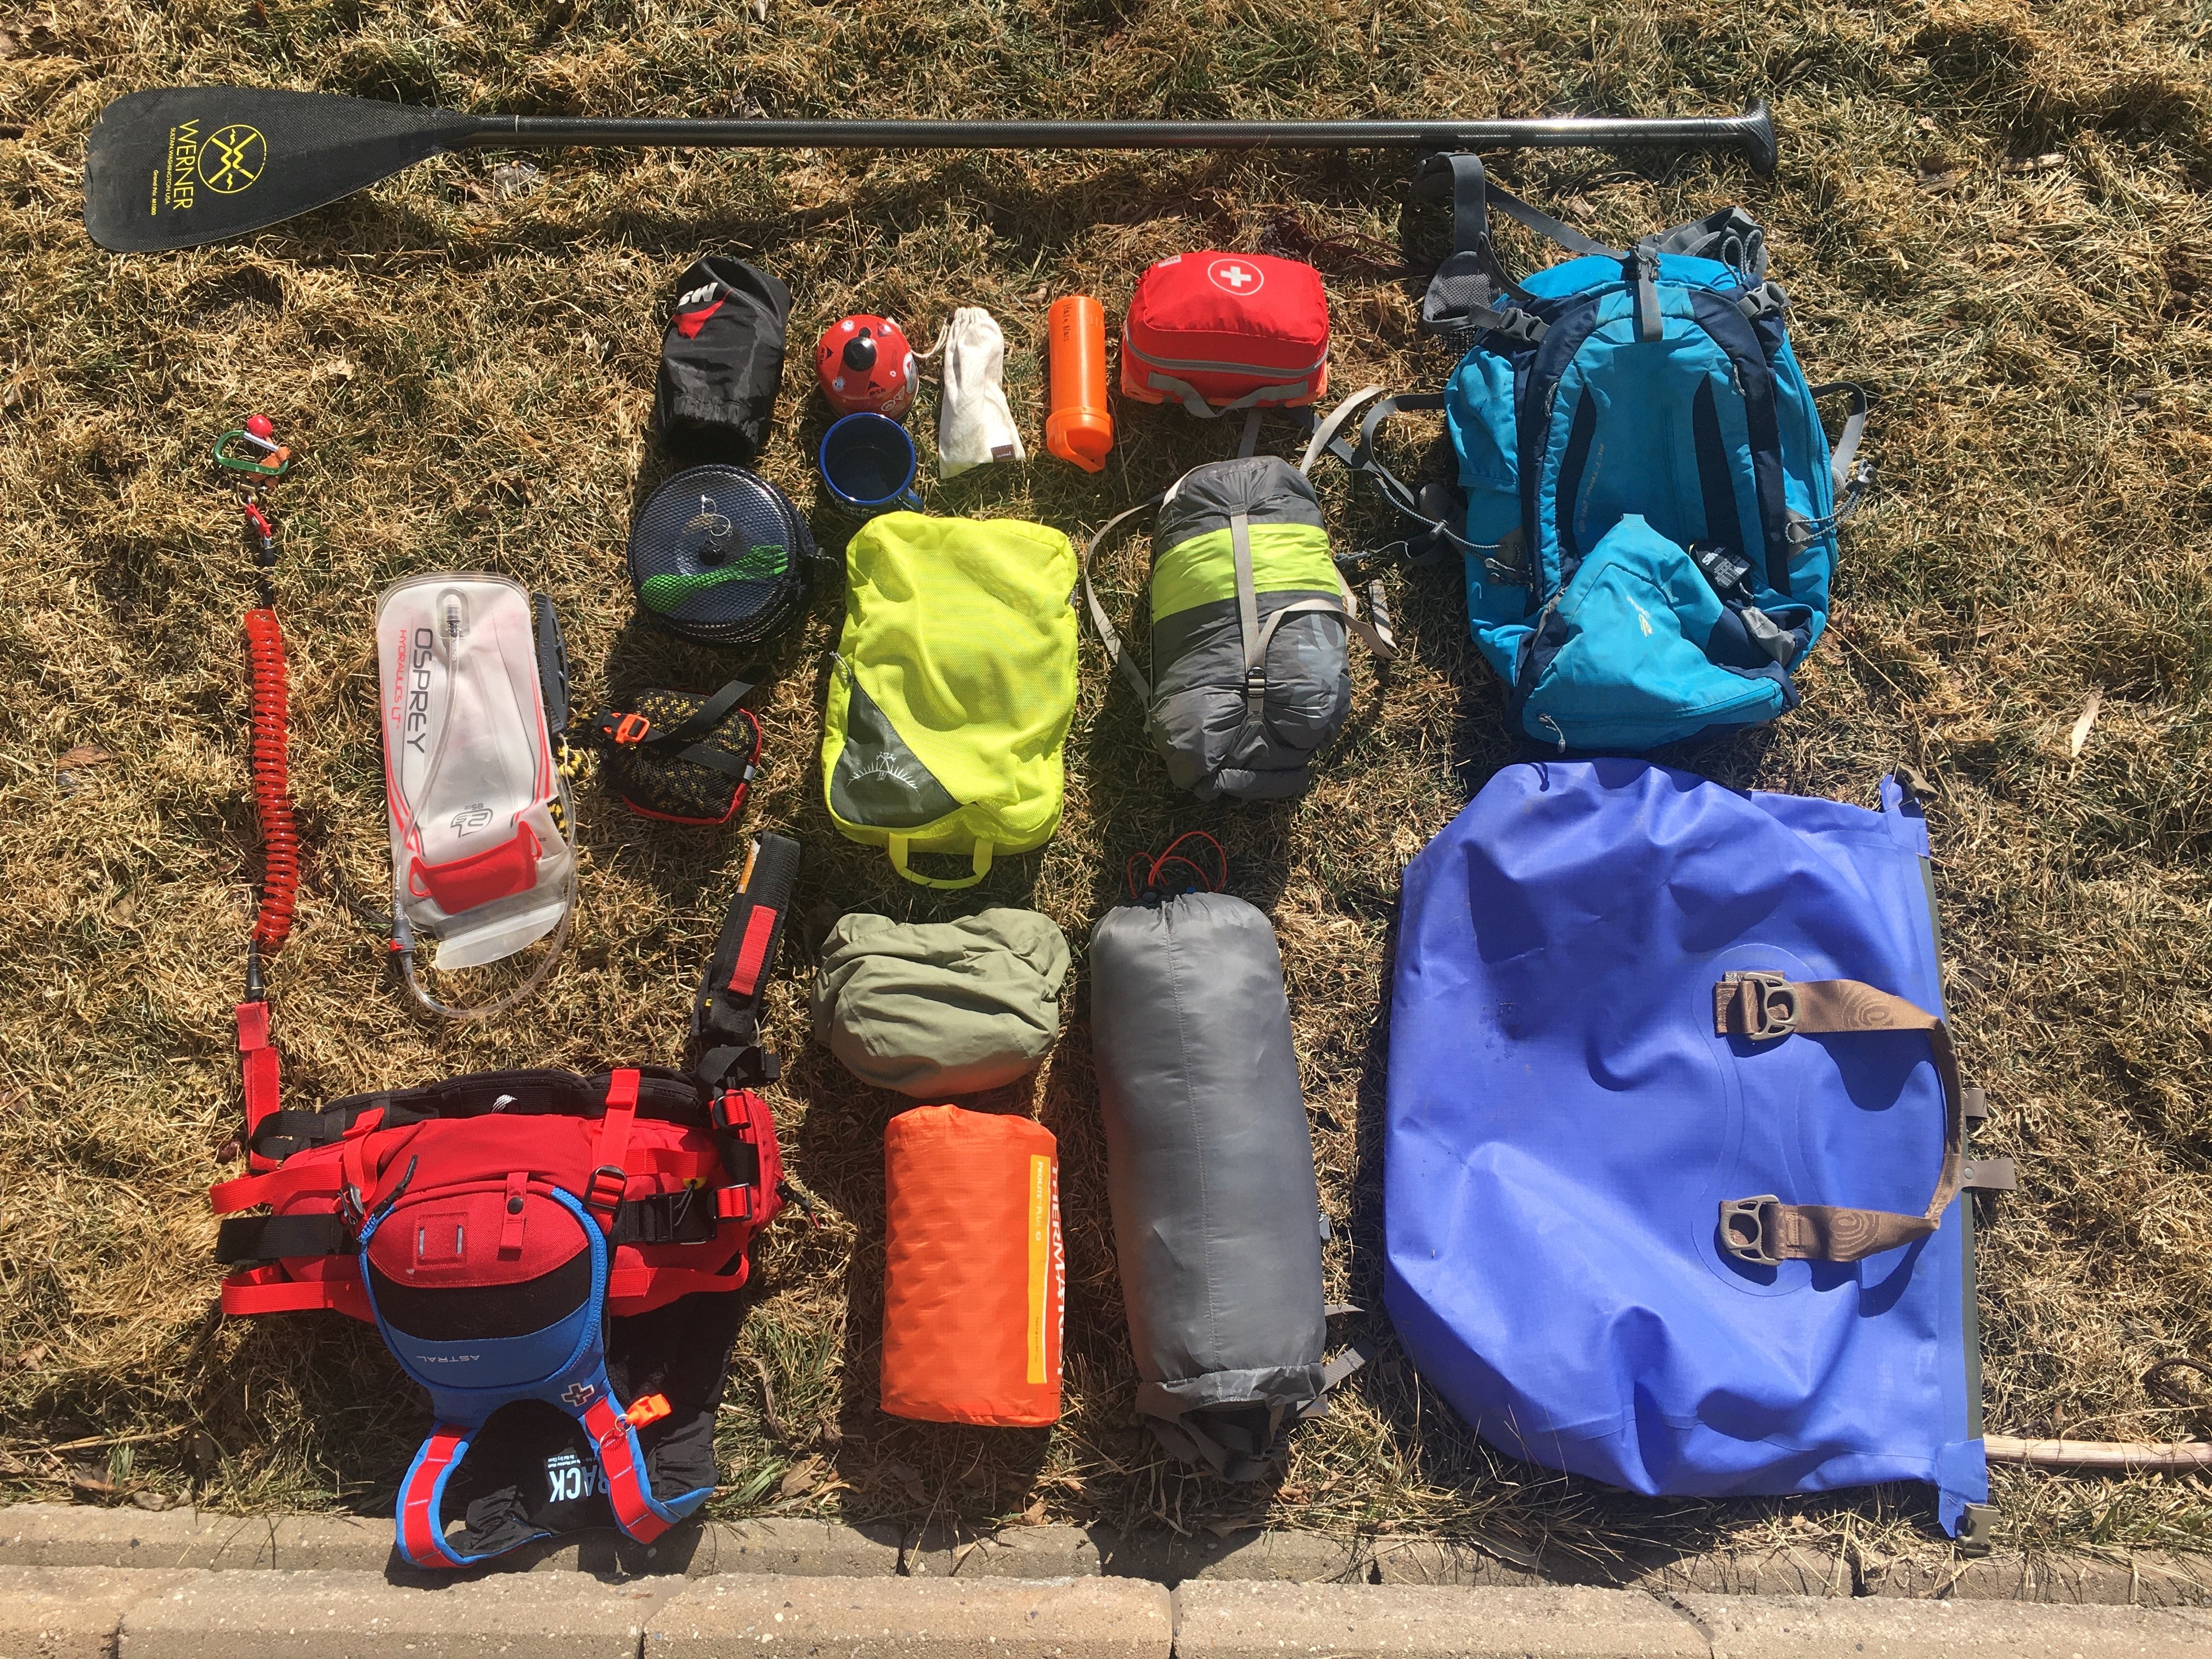
- Seriously though, what do I pack?
A board may seem like a small space to load your overnight gear onto, but you’re essentially packing as if you were hiking into your campsite. The plus side is you don’t have to carry everything on your back! Pack accordingly for the weather and think compact and light weight – compression bags, a lightweight stove and a compact pot set will go a long way.
Make sure you distribute the weight throughout your board, as well. If you have two bags, place one at the nose and one at the tail of your board. If you only have one bag, move your stance a little further back on the board.
Lastly, take everything for a test run before you commit to a big trip. Near Calgary you can head to Jewel Bay or Point backcountry campgrounds for a quick one night trip. You don’t even need to spend the night, you can simply go for a paddle with your gear and play around with the set up to see what feels best. Once you’ve done it a couple of times, you will find the set up that works best for YOU!