Here’s a basic guide to replacing your drysuit neck gasket. The same process still applies to replacing your wrist or ankle gasket. The only difference is that you'll have to use a different jig. A yogurt container will work just fine for them.
If your gasket just has a small tear there's a quick hack you can follow to get back on the water quick. The video for this hack is at the bottom of the article. For the full drysuit neck gasket repair (which you'll still eventually have to do even if you can get away with the hack for now) follow the simple steps below!
Shop AQ Outdoors Gasket Replacement and Repair
Drysuit Neck Gasket Repair
What You’ll Need
First of all, you are going to need a new neck gasket. I did all my gaskets at once so I wouldn’t have to be bothered later in the season. It is a good idea to check with the manufacturer of your suit what size of gasket is for your size of suit. The second thing you are going to need is some Aquaseal.
Kokatat Latex Neck Gasket

$64.95
Drysuit Neck Gasket Repair: Complete Guide Replacement latex neck gaskets for your drysuit or drytop. These come in small, medium and large. If you are replacing your own you will also need aquaseal adhesive. Video … Read More
Gear Aid Aquaseal +FD

$12.95
Aquaseal FD Flexible Durable Repair Adhesive is ideal for repairing holes and tears in dry bags, wetsuits, paddling apparel and latex gaskets. Waterproofs, seals and protects against abrasion. Aquaseal is the industry standard for maximum strength repairs to wetsuits, dry… Read More
You're also going to need some sand paper (recommended 180 grit) and a cleaning solvent. I used toluene.
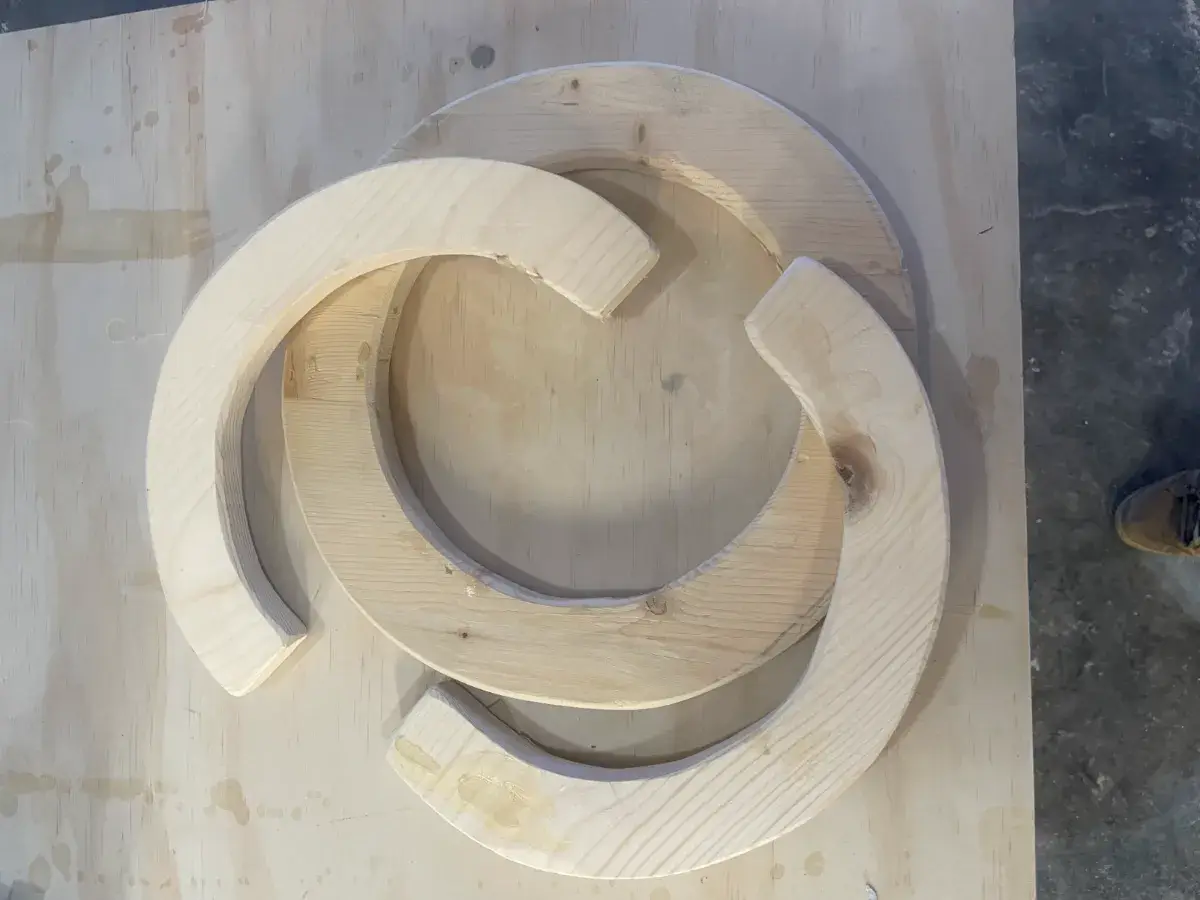
You will also need to come up with a “jig." This is a replacement tool that makes sure your gasket properly adheres to your suit. You can buy one, or make your own.
Other items are scissors, a container for the Aquaseal, a spreading stick, a pair of gloves, and some paper towel.
- Scissors
- Aquaseal
- Sandpaper
- Cleaning solvent
- jig/replacement tool
- Scissors
- Container
- Spreading stick
- Pair of gloves
- Paper towel
Kokatat Neck Gasket Tool Repair Kit

$124.95
Drysuit Neck Gasket Repair: Complete Guide The Kokatat Neck Gasket Tool Repair kit is a handy dandy setup for quickly, easily and with minimal mess changing out old or broken gaskets Features INCLUDES: 1 x Coated round repair board 2… Read More
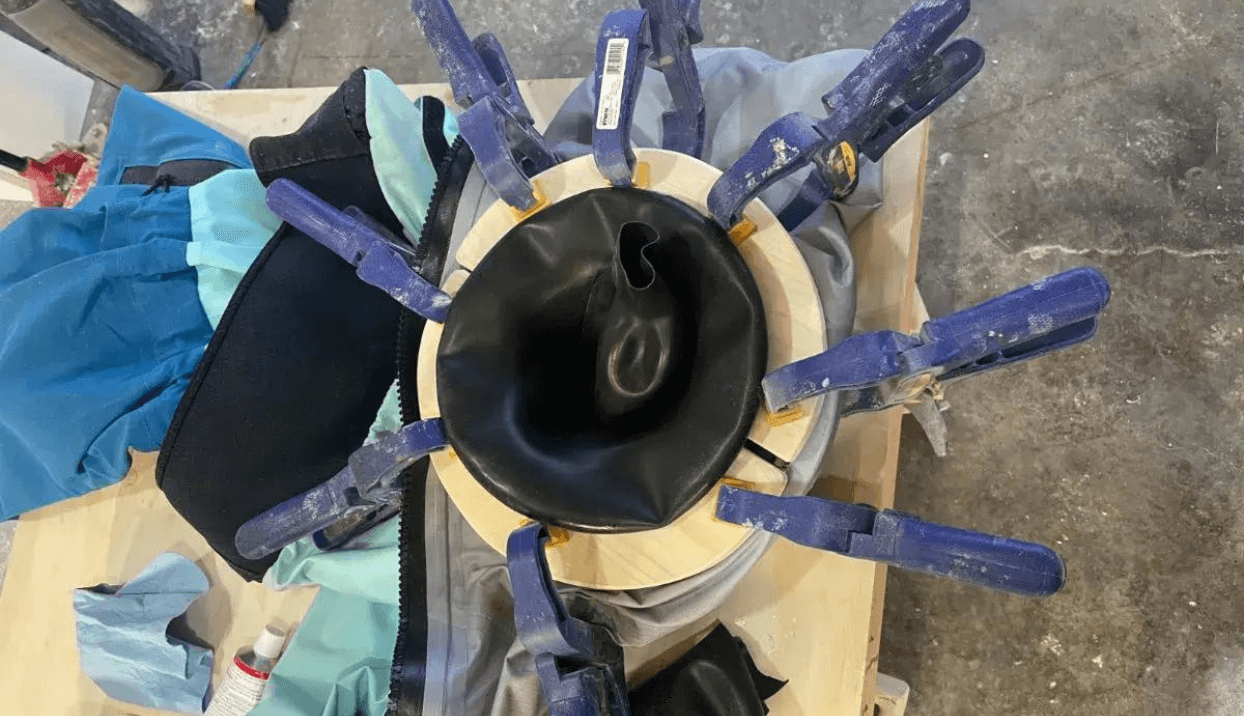
An example of a homemade neck gasket repair jig:
How to Repair a Drysuit Neck Gasket
Removing the Old Drysuit Neck Gasket
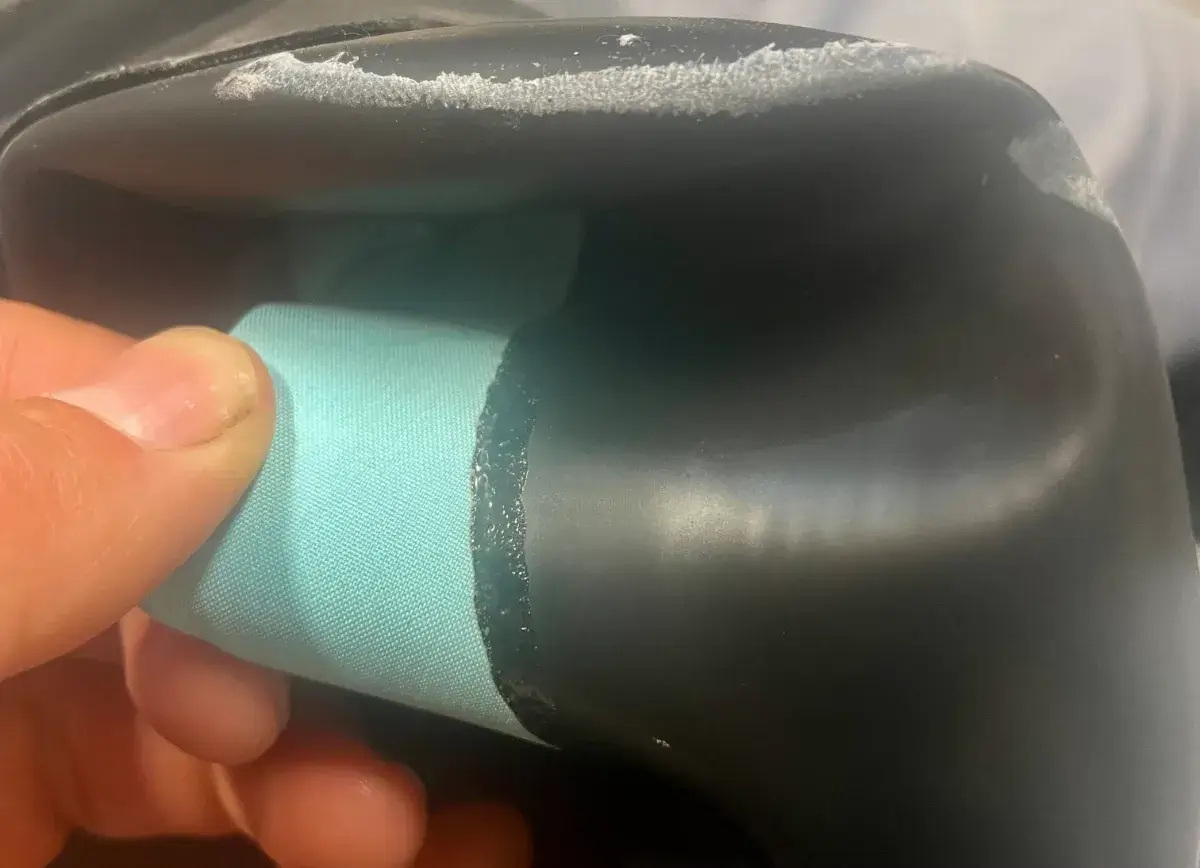
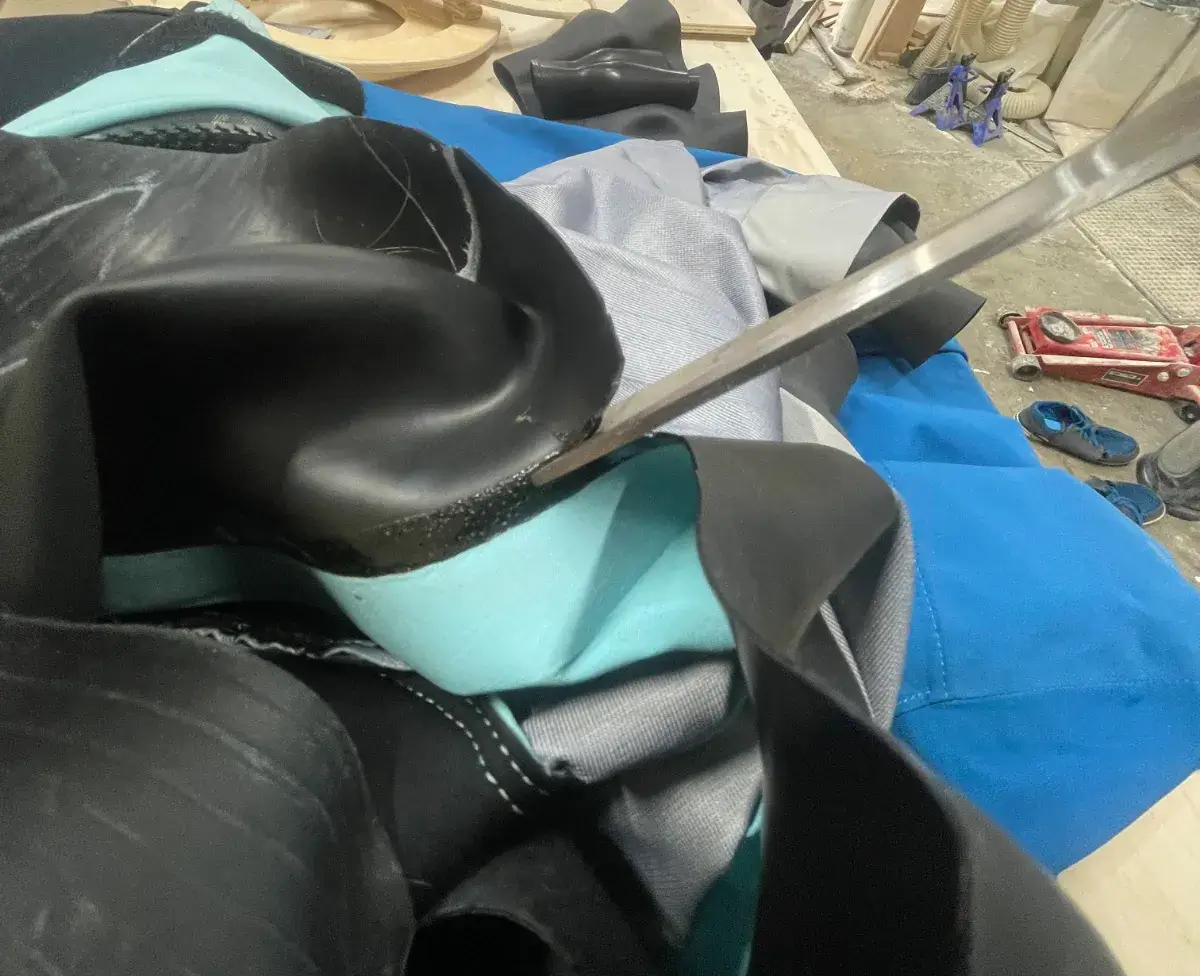
The old gasket needs to be cut away. On a Kokatat drysuit you can see the cut line along the edge of the gortex.
It has a shinier appearance compared to the gasket. Cut just along the edge of this, leaving a little of the gasket past the Gore-Tex.
Preparing the New Drysuit Neck Gasket
Spread the edge of the drysuit with the remaining gasket onto the jig, to help create a flat surface. This will ready the suit side for glueing the two sides together.
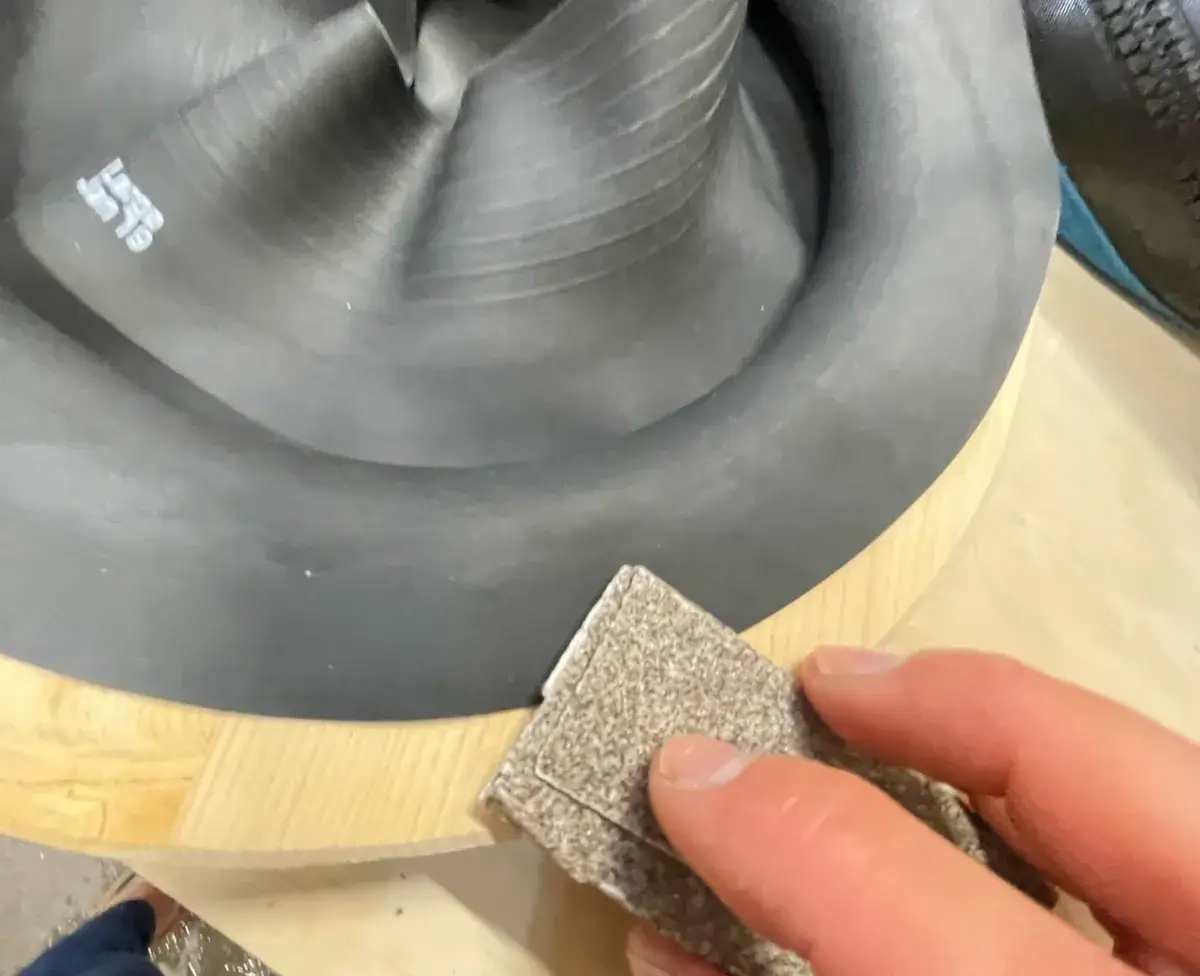
Lightly sand the first three quarters of an inch on the edge of the gasket and the edge that remains on the drysuit. The edge needs to be lightly sanded enough to help the aquaseal adhere to the gaskets.
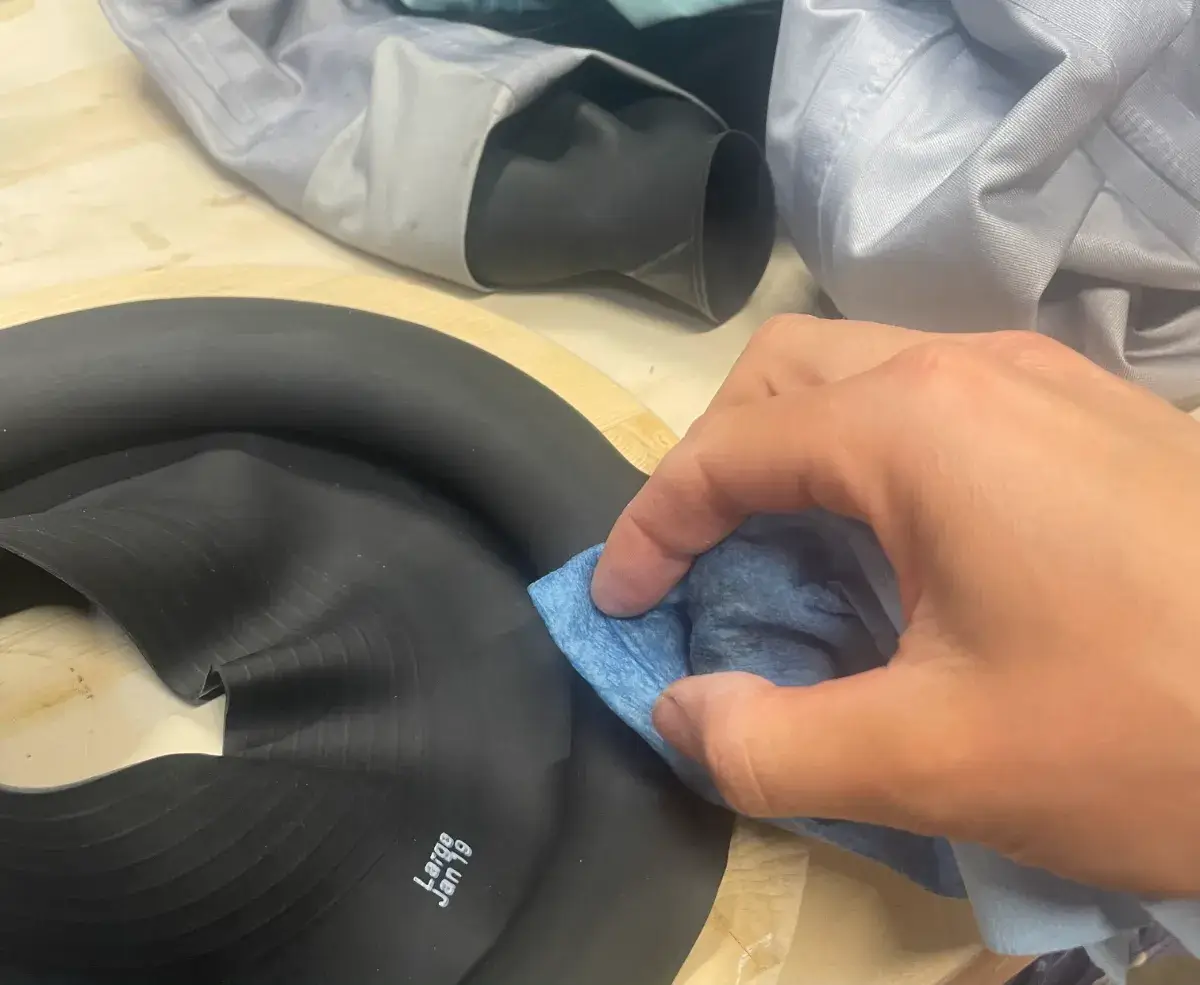
The second part of preparing the gasket is to clean away the dust produced by the sandpaper. Use the paper towel and the cleaning solvent to wipe away the dust.
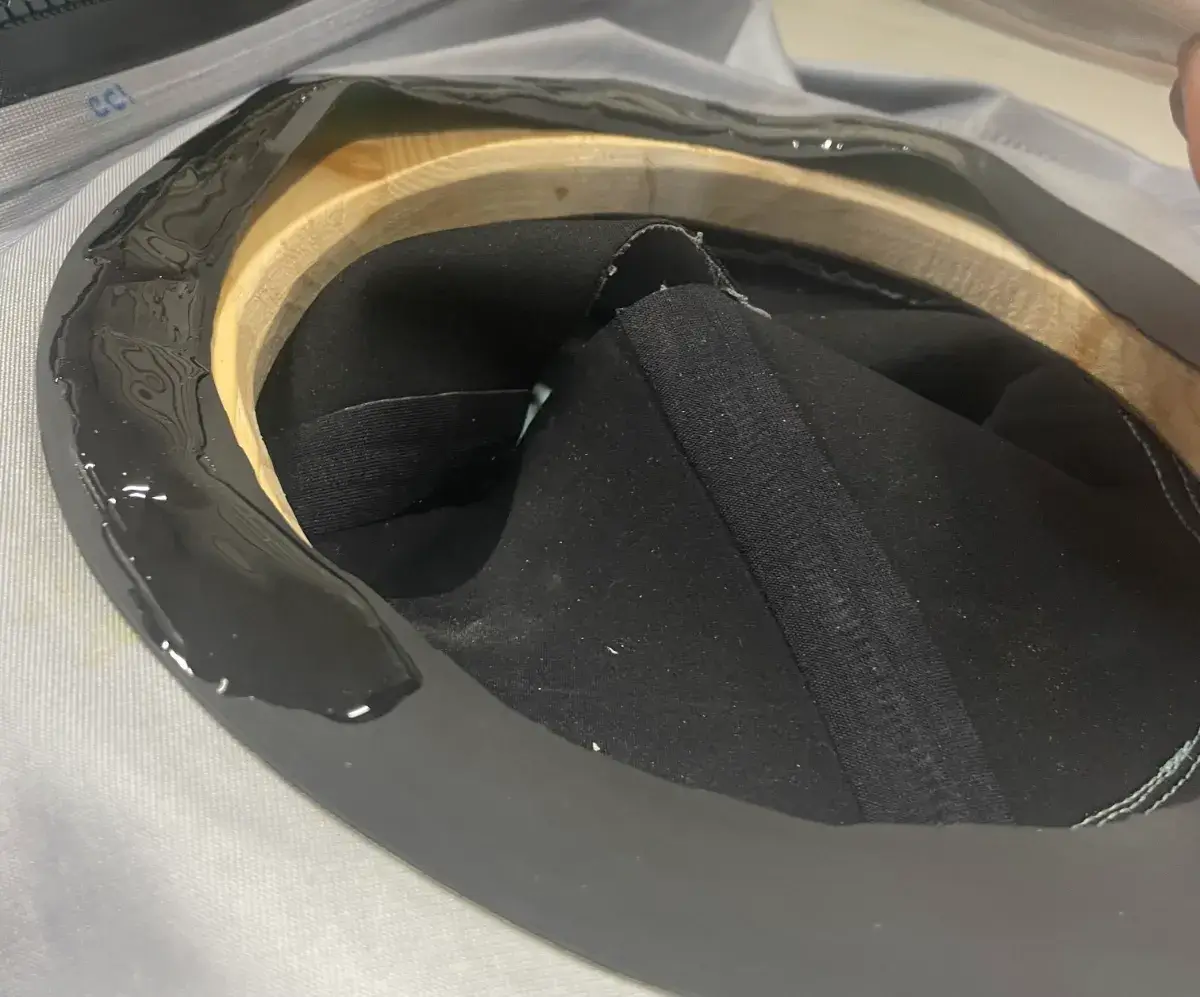
Spread a thin layer of the Aquaseal all the way around on the sanded edge of the gasket on the jig.
Glueing the Suit and Gasket Together
Before placing the two edges together, be ready to apply the last pieces of the jig in order to hold the new gasket to the suit.
Line up the two edges and place the new gasket onto the suit edge. Note that the edge of the gasket will begin to curl up once it comes in contact with glue. This is where the importance of the jig comes into play to hold the gasket from curling up.
Securing the Jig
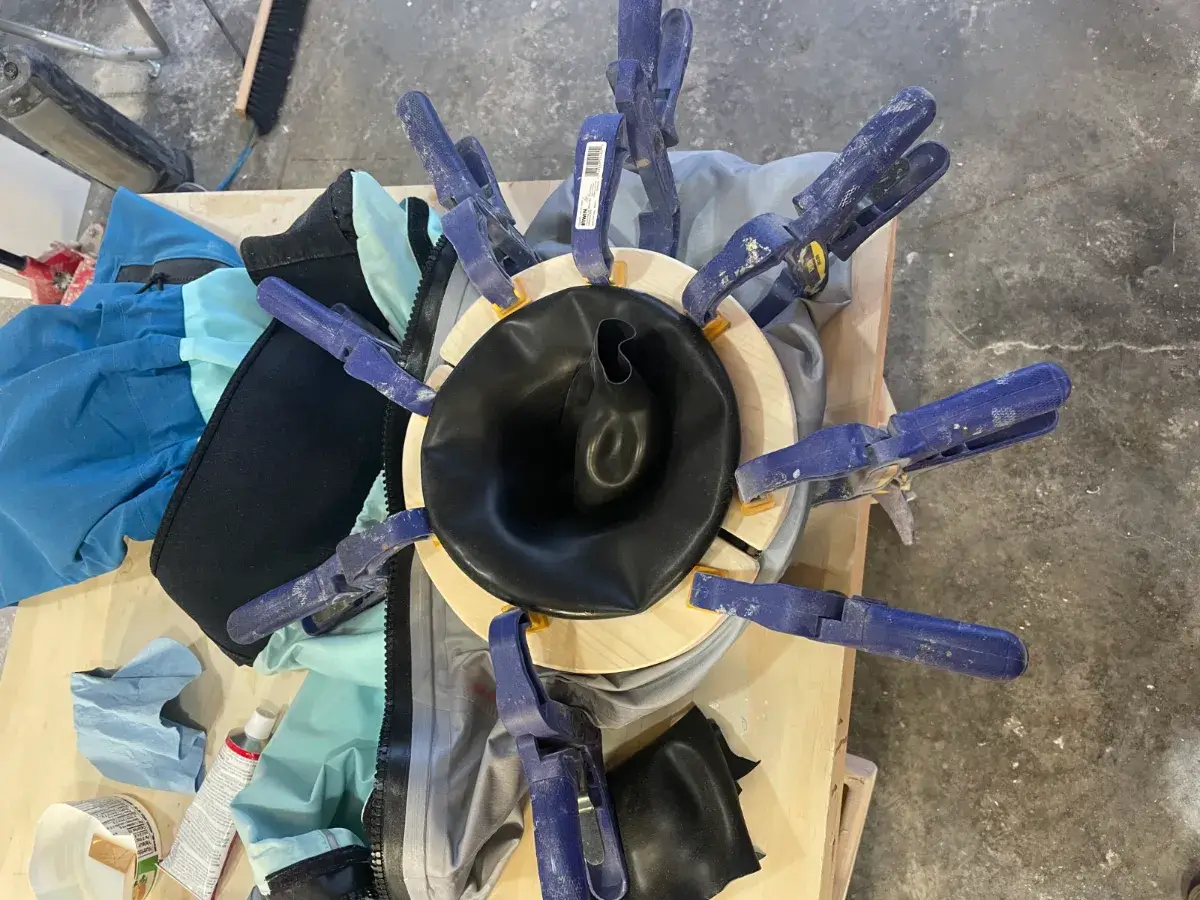
Secure the “jig” in place with some pressure in order to hold the new gasket to the piece still on the suit.
Curing Time
Leave the jig in place and let the new gasket sit and cure for 24 hours, then you're good to go!
Quick Drysuit Gasket Repair Hack
If your drysuit gasket just has a small tear, there's a quick fix option that'll get you back on the water without having to do a full repair. Although this hack can sometimes hold for a few paddles, your gasket will eventually need a full replacement.
Also note that this quick fix also means the gasket won't form as tight a seal as before, so there is a greater chance of water leakage. Check out the full video to see the process!
Click the link below to shop for all the drysuit gasket repair materials you'll need and if you have any questions please feel free to contact our knowledgable staff!
Shop AQ Outdoors Gasket Replacement and Repair
“Dreams don’t work unless you do”
Kimberley Kenyon
Badfish Team Athlete
AQ Outdoors Whitewater SUP and Splitboard Ambassador
Advanced and River 1 SUP Instructor Paddle Canada
@borntoboard.ca
AQ Outdoors Contact
Edmonton: (p) 780 463-4892 (e) info@aquabaticsedmonton.com
Calgary: (p) 403 288-9283 (e) info@aqoutdoors.com


